Mastering Homemade Marshmallows: Expert Tips for Soft Treats
Prepare to embark on a culinary journey that will forever change your perception of a simple sweet treat. If there's one indulgence that truly shines when crafted from scratch, it's the humble marshmallow. Forget everything you thought you knew about the store-bought variety; once you experience the ethereal texture, delicate sweetness, and subtle vanilla kiss of
homemade marshmallows, you might just find yourself utterly "ruined" for their packaged counterparts.
Imagine a cloud-soft morsel, perfectly sweet, melting effortlessly on your tongue or transforming into gooey perfection over a campfire. This isn't just a snack; it's an *experience*. While convenient for basic s'mores or Rice Krispie treats, mass-produced marshmallows simply can't compare to the nuanced flavor and unbelievably pillowy softness of a homemade batch. Today, we're inviting you to step up your dessert game and discover the unparalleled joy of creating these delightful confections in your own kitchen. It might seem like a daunting task, like all stovetop candy, but with the right guidance and a few expert tips, you'll be floating on Cloud 9 with your very own handcrafted treats.
Why Homemade Marshmallows Are a Game-Changer
The difference between homemade and store-bought marshmallows is truly night and day. It's a revelation that many home bakers discover with delightful surprise. Here's why making your own is an experience you won't want to miss:
- Unrivaled Texture: Mass-produced marshmallows are often chewy, rubbery, and somewhat dense. Homemade versions, on the other hand, boast an unbelievably soft, airy, and pillowy texture that gently yields with every bite. They practically melt in your mouth, offering a delicate chew that's miles away from anything you'll find in a bag.
- Superior Flavor Profile: Without the need for artificial preservatives or excessive stabilizers, homemade marshmallows shine with a cleaner, purer taste. A delicate kiss of pure vanilla extract is often all it takes to elevate them from good to absolutely exquisite. You can truly taste the quality of the ingredients.
- Customization Opportunities: Beyond vanilla, homemade marshmallows offer a blank canvas for flavor innovation. Imagine peppermint swirls for holiday hot cocoa, a hint of almond for an elegant dessert, or even a citrus zest for a bright, refreshing twist. This level of personalization is impossible with store-bought options.
- Freshness You Can Taste: Like any baked good, freshness is key. Homemade marshmallows, made with simple, wholesome ingredients and enjoyed within days of preparation, offer a vibrant, clean taste that pre-packaged versions simply can't match after sitting on a shelf.
Once you've tasted the difference, you'll understand why so many home bakers declare they've been "ruined" for store-bought marshmallows forever. This journey into confectionary creation is well worth the effort!
Essential Ingredients & Equipment for Marshmallow Magic
Crafting homemade marshmallows requires a few key ingredients and specific pieces of equipment to ensure success. Don't worry, most items are standard kitchen tools, but a couple are non-negotiable for achieving that perfect cloud-like texture and flavor.
The Vital Ingredients:
- Unflavored Gelatin: This is the structural backbone of your marshmallows, giving them their iconic bounce and stability. Use good quality unflavored gelatin, typically found in individual packets.
- Granulated Sugar: Provides sweetness and, when cooked into a syrup, contributes to the marshmallow's structure and sheen.
- Light Corn Syrup: Crucial for preventing sugar crystallization, which can lead to a grainy texture. It also adds a subtle sweetness and helps achieve that desirable chewy-but-soft consistency.
- Kosher Salt: A pinch of salt balances the sweetness and enhances all the other flavors, making your marshmallows taste richer and more complex.
- Pure Vanilla Extract: The soul of a classic marshmallow! Use high-quality pure vanilla extract for the best flavor.
- Confectioners' Sugar (Powdered Sugar): Essential for dusting the pan and the finished marshmallows. It prevents sticking and gives them their characteristic matte finish.
Crucial Equipment:
- Stand Mixer with Whisk Attachment: Absolutely indispensable. You'll be whipping the marshmallow mixture for an extended period (around 15 minutes) on high speed, which is impossible to do by hand.
- Small Heavy-Bottomed Saucepan: For cooking the sugar syrup. A heavy bottom helps distribute heat evenly and prevents scorching.
- Candy Thermometer: This is *not* optional for success. Accuracy in reaching the soft-ball stage (240°F / 115°C) is critical for the right consistency. Guessing can lead to marshmallows that are too soft and runny, or too firm and rubbery.
- 8x12-inch Nonmetal Baking Dish: Pay close attention to this! As some expert bakers caution, using a metal pan can impart a strange, unpleasant metallic aftertaste to your delicate marshmallows. Opt for glass, ceramic, or silicone instead to preserve the pure, sweet flavor.
- Sieve: For generously dusting your pan and marshmallows with confectioners' sugar, ensuring an even, fine coating.
Step-by-Step Guide to Cloud-Like Perfection
Making marshmallows is a process of careful timing and temperature control, but each step is straightforward. Follow these instructions closely, and you'll be rewarded with heavenly treats.
Preparing Your Gelatin Base
The first step is to bloom your gelatin. In the large bowl of your electric stand mixer (the one you'll be whipping in), combine the gelatin with ½ cup of cold water. Give it a quick stir, then let it sit undisturbed. This allows the gelatin granules to fully hydrate and soften, forming a thick, jelly-like consistency. It will be ready to go by the time your sugar syrup is cooked.
Crafting the Sugar Syrup
While the gelatin is blooming, prepare your sugar syrup. In your small saucepan, combine the granulated sugar, light corn syrup, kosher salt, and another ½ cup of water. Place the saucepan over medium heat, stirring gently until the sugar has completely dissolved. Once dissolved, increase the heat to high. Insert your candy thermometer, making sure the tip doesn't touch the bottom of the pan. Cook the syrup without stirring until it reaches precisely 240°F (115°C), which is the soft-ball stage. This temperature is crucial; it ensures the marshmallows set correctly without being too hard or too sticky. Immediately remove the saucepan from the heat once it hits the mark. Safety first: hot sugar syrup is extremely hot and can cause severe burns, so handle with extreme care.
The Whipping Transformation
With your mixer on a low speed, carefully and slowly pour the hot sugar syrup into the dissolved gelatin mixture. Pour it down the side of the bowl to avoid splashing and ensure it incorporates evenly. Once all the syrup is added, increase the mixer speed to high. Now, let the magic happen! Whip the mixture continuously for about 12-15 minutes. During this time, the mixture will transform dramatically: it will become incredibly thick, glossy, and increase significantly in volume, turning from a translucent liquid into an opaque, fluffy, white marshmallow batter. It should hold stiff peaks when you lift the whisk. Finally, add your pure vanilla extract and mix thoroughly for another 30 seconds to ensure it's fully incorporated.
Setting and Slicing Your Sweet Treats
Before pouring, generously dust your nonmetal 8x12-inch baking dish with confectioners' sugar using a sieve. This creates a non-stick barrier. Quickly pour the thick marshmallow mixture into the prepared pan. The mixture is quite sticky and sets fast, so work efficiently. Use an offset spatula or a lightly oiled rubber spatula to gently smooth the top. Once smoothed, dust the top of the marshmallow layer with even more confectioners' sugar. Now comes the waiting game: allow the marshmallows to stand uncovered at room temperature, ideally overnight (or at least 6-8 hours), until they are fully set and dry to the touch. This drying process is essential for their final texture.
Once completely set, invert the pan onto a large cutting board heavily dusted with confectioners' sugar. The block of marshmallow should release easily. Use a sharp, lightly oiled knife or a pizza cutter to cut the marshmallow into your desired squares or rectangles. As you cut, dip the knife frequently in hot water or lightly grease it to prevent sticking. Finally, toss the cut marshmallows in more confectioners' sugar to coat all sides, preventing them from sticking together. And just like that, you've reached Cloud 9!
Expert Tips for Flawless Homemade Marshmallows
While the basic steps are straightforward, a few insider tips can elevate your homemade marshmallow game from good to absolutely perfect.
Achieving cloud-like perfection is easier than you think with these actionable insights.
Troubleshooting Common Issues:
- Marshmallows Are Too Sticky: This is often due to not enough confectioners' sugar coating or not allowing them to dry out long enough. Ensure your pan is generously dusted, and don't skimp on the final dusting. If they're still too sticky, a bit more sugar coating or a longer uncovered rest period (even up to 24 hours in humid climates) can help.
- Marshmallows Didn't Set: The most common culprit here is not cooking the sugar syrup to the correct temperature (240°F / 115°C). A candy thermometer is crucial for accuracy. If the syrup doesn't reach this temperature, the gelatin won't have enough sugar to form a stable structure. Humidity can also play a role, so try to make them on a dry day.
- Grainy Texture: This usually means the sugar crystallized. To avoid this, ensure all sugar dissolves before the syrup comes to a boil, and avoid stirring the syrup once it starts boiling. Using light corn syrup also helps prevent crystallization.
Flavor & Color Variations:
Don't stop at vanilla! Homemade marshmallows are incredibly versatile:
- Extracts: Replace or complement vanilla with almond, peppermint, coffee, lemon, orange, or even rum extract. Add these during the last minute of whipping.
- Spices: Whisk in a teaspoon of cinnamon, nutmeg, or pumpkin pie spice with the vanilla.
- Citrus Zest: Add finely grated lemon or orange zest for a bright flavor.
- Food Coloring: Add a few drops of gel food coloring during the last minute of whipping for festive hues.
Storage & Shelf Life:
Store homemade marshmallows in an airtight container at room temperature for up to 2-3 weeks. They do not need to be refrigerated, as refrigeration can actually dry them out and make them hard. If they start to get a little firm, simply let them sit at room temperature for a bit to soften.
Creative Uses for Your Masterpieces:
The possibilities are endless!
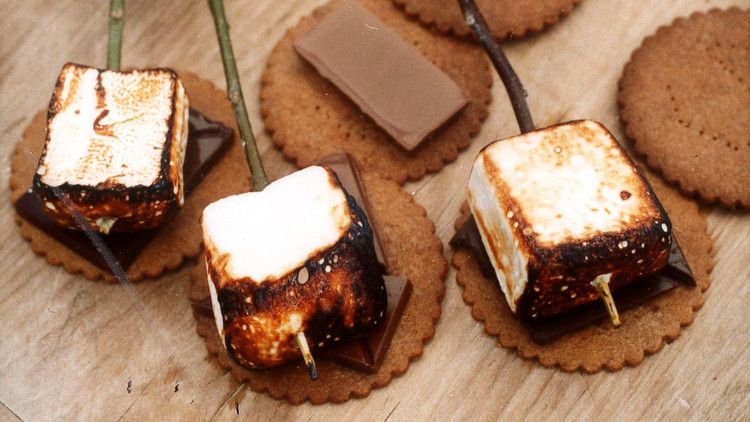
- Gourmet S'mores: Elevate your campfire experience with homemade marshmallows that caramelize beautifully.
- Hot Cocoa Perfection: Drop a few into your favorite hot chocolate for a luxurious, melting treat.
- Rice Krispie Treats: Melt them down for the ultimate chewy and flavorful Rice Krispie treats.
- Edible Gifts: Package them in pretty bags or boxes for a thoughtful, handmade gift.
- Snacking: Honestly, sometimes the best way to enjoy them is simply on their own!
Final Pro-Tip: Clean-Up
The stand mixer bowl and whisk will be covered in sticky marshmallow residue. Don't scrub! Fill the bowl with hot water immediately after transferring the mixture to the pan, and let it sit for 10-15 minutes. The hot water will dissolve the sugar, making clean-up a breeze.
Conclusion
Diving into the world of homemade marshmallows is a truly rewarding experience that promises a level of flavor and texture unmatched by anything store-bought. From the first pour of the glistening sugar syrup to the final dusting of confectioners' sugar, each step builds anticipation for the soft, sweet treasures you're creating. It's a testament to the fact that sometimes, the simplest pleasures are the ones we craft ourselves. So, gather your ingredients, trust your candy thermometer, and prepare to delight your senses with these cloud-like confections. Once you taste the difference, there's no going back – welcome to your new favorite homemade treat!