Easy Homemade Marshmallows: Your Guide to Cloud 9 Perfection
Prepare yourself for a culinary revelation that will forever change your perception of a beloved sweet treat. If there's one indulgence that truly shines brightest when crafted from scratch, it's homemade marshmallows. Forget everything you thought you knew about those bland, chewy, store-bought squares. We're talking about a world where marshmallows are cloud-soft, delicately sweet, infused with a gentle kiss of vanilla, and boast an irresistible melt-in-your-mouth texture that simply cannot be replicated by anything pre-packaged. Get ready to ascend to Cloud 9, where every bite is an experience in pure, pillowy bliss.
For anyone who has ever sampled a truly exceptional homemade marshmallow, you understand the profound difference. While their packaged counterparts serve a purpose for quick s'mores over a campfire or for whipping up a batch of rice krispie treats, they pale in comparison to the artisanal experience of a freshly made batch. This guide is your ticket to
Homemade Marshmallows: The Pillow-Soft Recipe That Rivals Store-Bought, ensuring your journey from basic baker to marshmallow master is smooth and satisfying.
Why Homemade Marshmallows Are a Game Changer
The moment you taste a homemade marshmallow, you'll realize why many call it a "ruining" experience – because you'll never look at the store-bought variety the same way again. The distinction lies in several key areas:
*
Unrivaled Texture: Store-bought marshmallows often have a rubbery, dense consistency. Homemade versions, however, are unbelievably light, airy, and possess a tender chew that yields effortlessly. They literally feel like biting into a sweet, vanilla-scented cloud.
*
Superior Flavor Profile: Without artificial preservatives and with the ability to use high-quality ingredients like pure vanilla extract, homemade marshmallows offer a clean, sweet taste that is subtly complex and incredibly satisfying. The sweetness is balanced, not cloying.
*
Freshness You Can Taste: Like any freshly baked good, the immediate enjoyment of homemade marshmallows brings a vibrant freshness that pre-packaged items simply cannot offer.
*
Endless Customization: While vanilla is a classic, making marshmallows from scratch opens up a world of flavoring possibilities, from peppermint and orange zest to coffee or almond extracts.
This recipe, originally a beloved gem from a now out-of-print cookbook, is too good to keep hidden. We're here to guide you through every step, demystifying the process and empowering you to add this incredible treat to your baking bucket list.
The Essential Ingredients for Cloud 9 Perfection
Making marshmallows might seem intimidating if you're new to stovetop candy, but with a few simple ingredients and a good understanding of the process, success is well within reach. Here's what you'll need:
*
Unflavored Gelatin (3 packages): This is the structural backbone of your marshmallows, responsible for their signature bounce and set.
*
Granulated Sugar (1 ½ cups): Provides the primary sweetness and contributes to the syrup's consistency.
*
Light Corn Syrup (1 cup): A crucial ingredient that helps prevent the sugar from crystallizing, ensuring a smooth, pliable marshmallow texture. It also adds to the syrup's body.
*
Kosher Salt (¼ teaspoon): A small but mighty addition that balances the sweetness and enhances all the other flavors.
*
Pure Vanilla Extract (1 tablespoon): Opt for pure vanilla extract over imitation for the best, most aromatic vanilla flavor. This is where your marshmallows truly sing!
*
Confectioners' Sugar (for dusting): Essential for preventing stickiness, both in the pan and after cutting.
Step-by-Step Guide to Crafting Your Marshmallow Masterpiece
Embarking on your homemade marshmallow journey is incredibly rewarding. Follow these steps carefully, and you'll be enjoying your pillowy creations in no time.
Preparation is Key
- Bloom the Gelatin: In the bowl of your electric stand mixer (fitted with the whisk attachment), combine 3 packages of unflavored gelatin with ½ cup of cold water. Give it a quick stir to ensure all the gelatin is moistened, then let it sit undisturbed while you prepare the sugar syrup. This "blooming" process allows the gelatin granules to absorb water, making them ready to dissolve evenly when the hot syrup is added.
- Prepare Your Pan: Select an 8 by 12-inch non-metal baking dish. This is a crucial detail! Metal pans can impart a strange, metallic aftertaste to your delicate marshmallows, so stick to glass, ceramic, or silicone. Using a sieve, generously dust the bottom and sides of the pan with confectioners' sugar. Don't be shy; a liberal coating will prevent sticking later.
The Syrup's Sweet Science
- Combine Syrup Ingredients: In a small, heavy-bottomed saucepan, combine the granulated sugar, light corn syrup, kosher salt, and another ½ cup of water.
- Dissolve and Heat: Cook this mixture over medium heat, stirring occasionally, until the sugar completely dissolves. This ensures a smooth syrup.
- Boil to Temperature: Once the sugar is dissolved, raise the heat to high. Insert a candy thermometer into the syrup, making sure it doesn't touch the bottom of the pan. Cook without stirring until the syrup reaches precisely 240°F (115°C). This "soft ball" stage is critical for the marshmallow's final texture. Remove the pan from the heat immediately once it reaches temperature.
Whipping Up the Magic
- Slow Pour and Whip: With your electric mixer on low speed, slowly and carefully pour the hot sugar syrup into the dissolved gelatin mixture. Be careful, as the syrup is very hot! Once all the syrup is added, increase the mixer speed to high.
- Whip Until Thick: Continue to whip the mixture on high speed for about 12-15 minutes. During this time, the mixture will transform dramatically: it will become very thick, glossy, opaque, and increase significantly in volume. It should hold stiff peaks when the whisk is lifted.
- Add Vanilla: With the mixer still running, pour in the 1 tablespoon of pure vanilla extract and continue to mix for another minute or two until thoroughly incorporated. The aroma will be intoxicating!
Setting the Stage
- Pour and Smooth: Quickly, but carefully, pour the thick marshmallow mixture into your generously dusted non-metal baking dish. Use an offset spatula or the back of a spoon (lightly greased with a neutral oil if it's sticking) to gently smooth the top.
- Dust Again: Sieve a generous layer of confectioners' sugar over the entire surface of the marshmallow mixture in the pan.
- Allow to Set: Leave the pan uncovered at room temperature to dry out and set. This is a crucial step that cannot be rushed. Ideally, allow it to stand overnight, or at least for several hours (minimum 6-8 hours). The longer it sets, the less sticky it will be when you cut it.
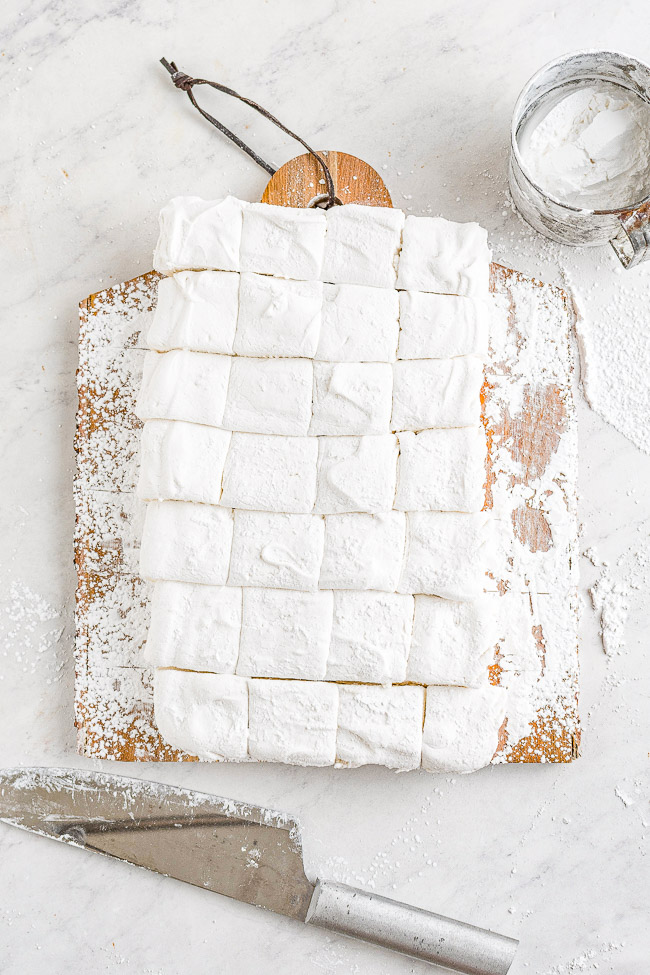
Cutting and Finishing Touches
- Unmold and Cut: Once completely set, gently loosen the edges with a knife and invert the marshmallow slab onto a cutting board heavily dusted with more confectioners' sugar. Using a sharp, lightly oiled knife or kitchen shears, cut the marshmallow into your desired squares or rectangles. Re-oil your knife or shears as needed to prevent sticking.
- Final Dusting: Generously dust all sides of the cut marshmallows with additional confectioners' sugar to prevent them from sticking to each other. You can even toss them gently in a bowl of confectioners' sugar.
Expert Tips for Flawless Homemade Marshmallows
To ensure your
Mastering Homemade Marshmallows: Expert Tips for Soft Treats are always perfect, keep these essential tips in mind:
*
The Candy Thermometer is Your Best Friend: This is arguably the most critical tool for marshmallow success. Accurate temperature is non-negotiable for achieving the correct texture. Do not guess or eyeball the syrup temperature.
*
Invest in a Stand Mixer: While possible with a powerful hand mixer, a stand mixer is highly recommended due to the long whipping time (12-15 minutes) and the density of the mixture. It needs strong, consistent aeration.
*
Don't Skimp on Dusting: Confectioners' sugar is your shield against stickiness. Be generous when preparing the pan and when dusting the cut marshmallows. This ensures they are easy to handle and store.
*
Patience is a Virtue: The setting time is crucial. Resist the urge to cut them early! An overnight rest allows the gelatin to fully set and the surface to dry slightly, resulting in a cleaner cut and less sticky marshmallows.
*
Storage Savvy: Store your homemade marshmallows in an airtight container at room temperature for up to two weeks. They tend to dry out if exposed to air.
*
Flavor Adventures: Once you've mastered the vanilla base, experiment! Add a different extract (almond, peppermint, coconut), infuse the hot syrup with tea bags, or even swirl in a little melted chocolate at the end of whipping. For mini marshmallows perfect for hot cocoa, cut them into smaller cubes!
*
Uses Beyond Expectation: These aren't just for eating plain (though they're divine!). Use them to elevate your s'mores game to an entirely new level, drop them into hot chocolate for an unparalleled treat, or melt them down for the most luxurious rice krispie treats you've ever tasted.
Conclusion
Making homemade marshmallows is more than just following a recipe; it's an experience that transforms a simple sweet into something truly extraordinary. With a few basic ingredients, some careful steps, and a little patience, you can create a batch of pillowy, vanilla-scented clouds that will impress everyone who tries them. Say goodbye to the mundane and embrace the magic of crafting your own confections. Your taste buds, and anyone you share these with, will thank you for taking the journey to Cloud 9.